
The Blog
Carrying Knowledge Forward
Welcome to the life of Sew Yup’ik. Reconnecting with our ancestral ways and helping others do the same.
Expanding the Work of Sew Yup'ik: Contract Services Now Available
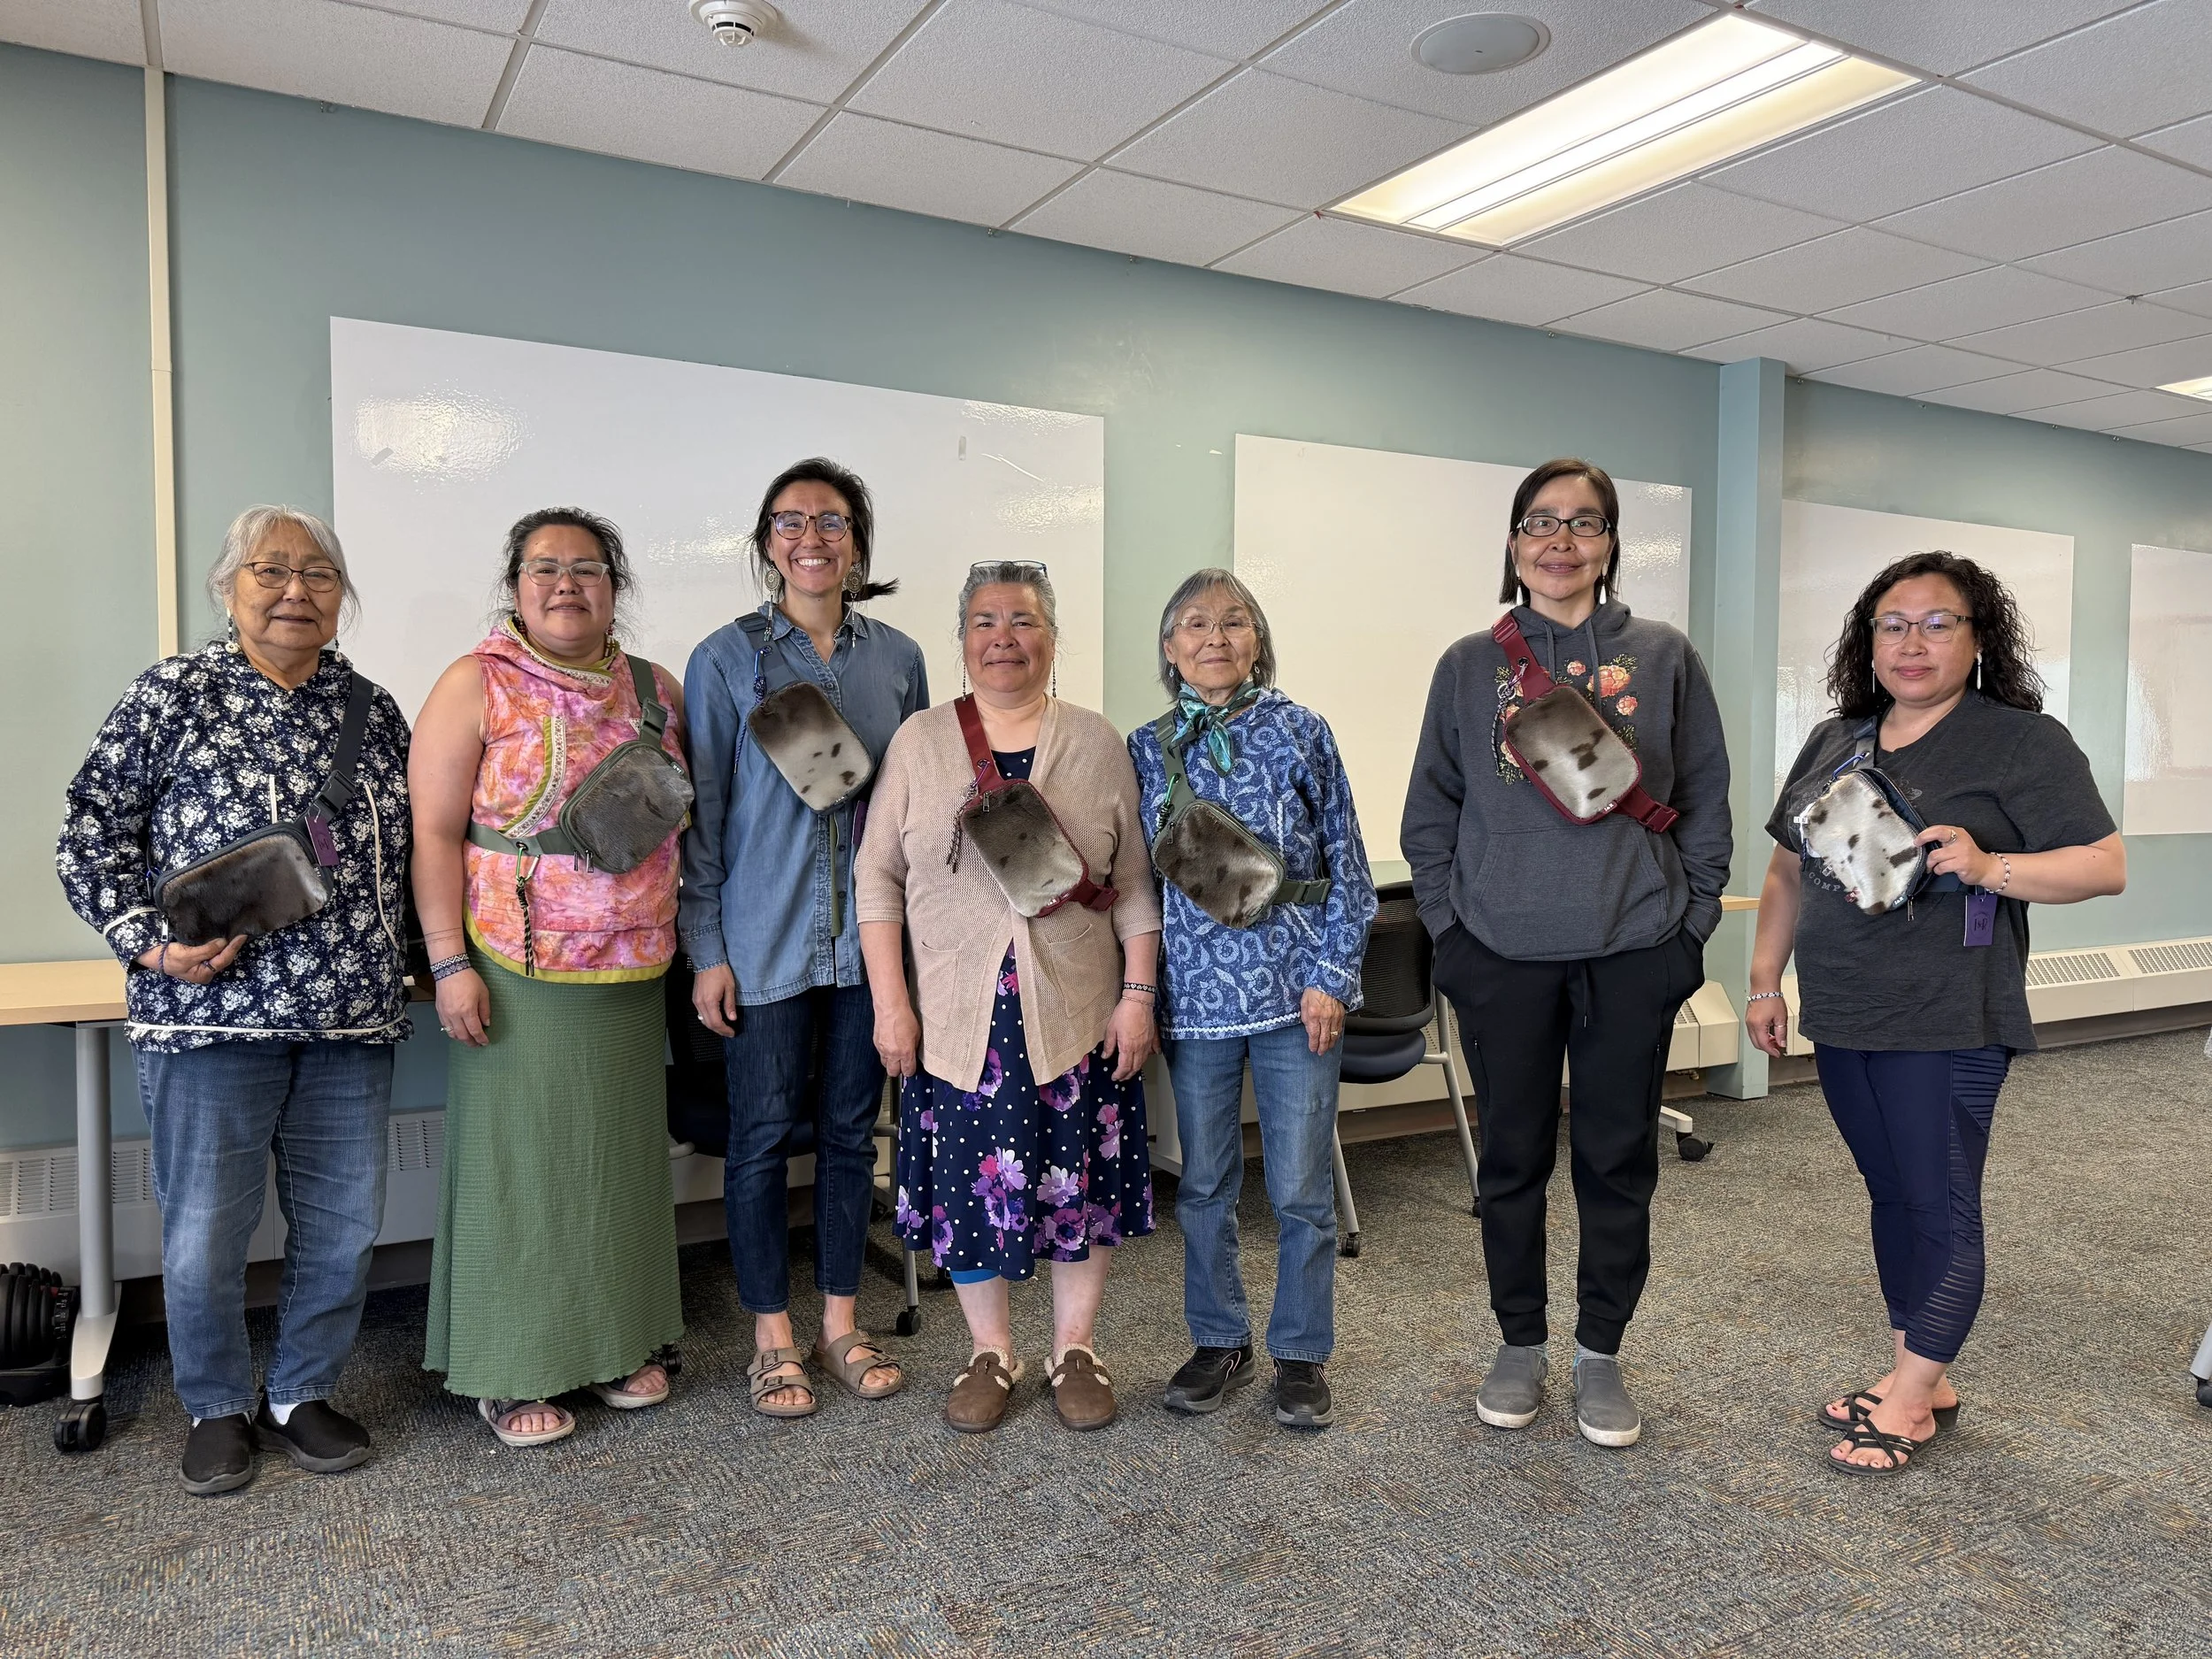
Sealskin crossbody workshop in Mamterrilleq
June 2026
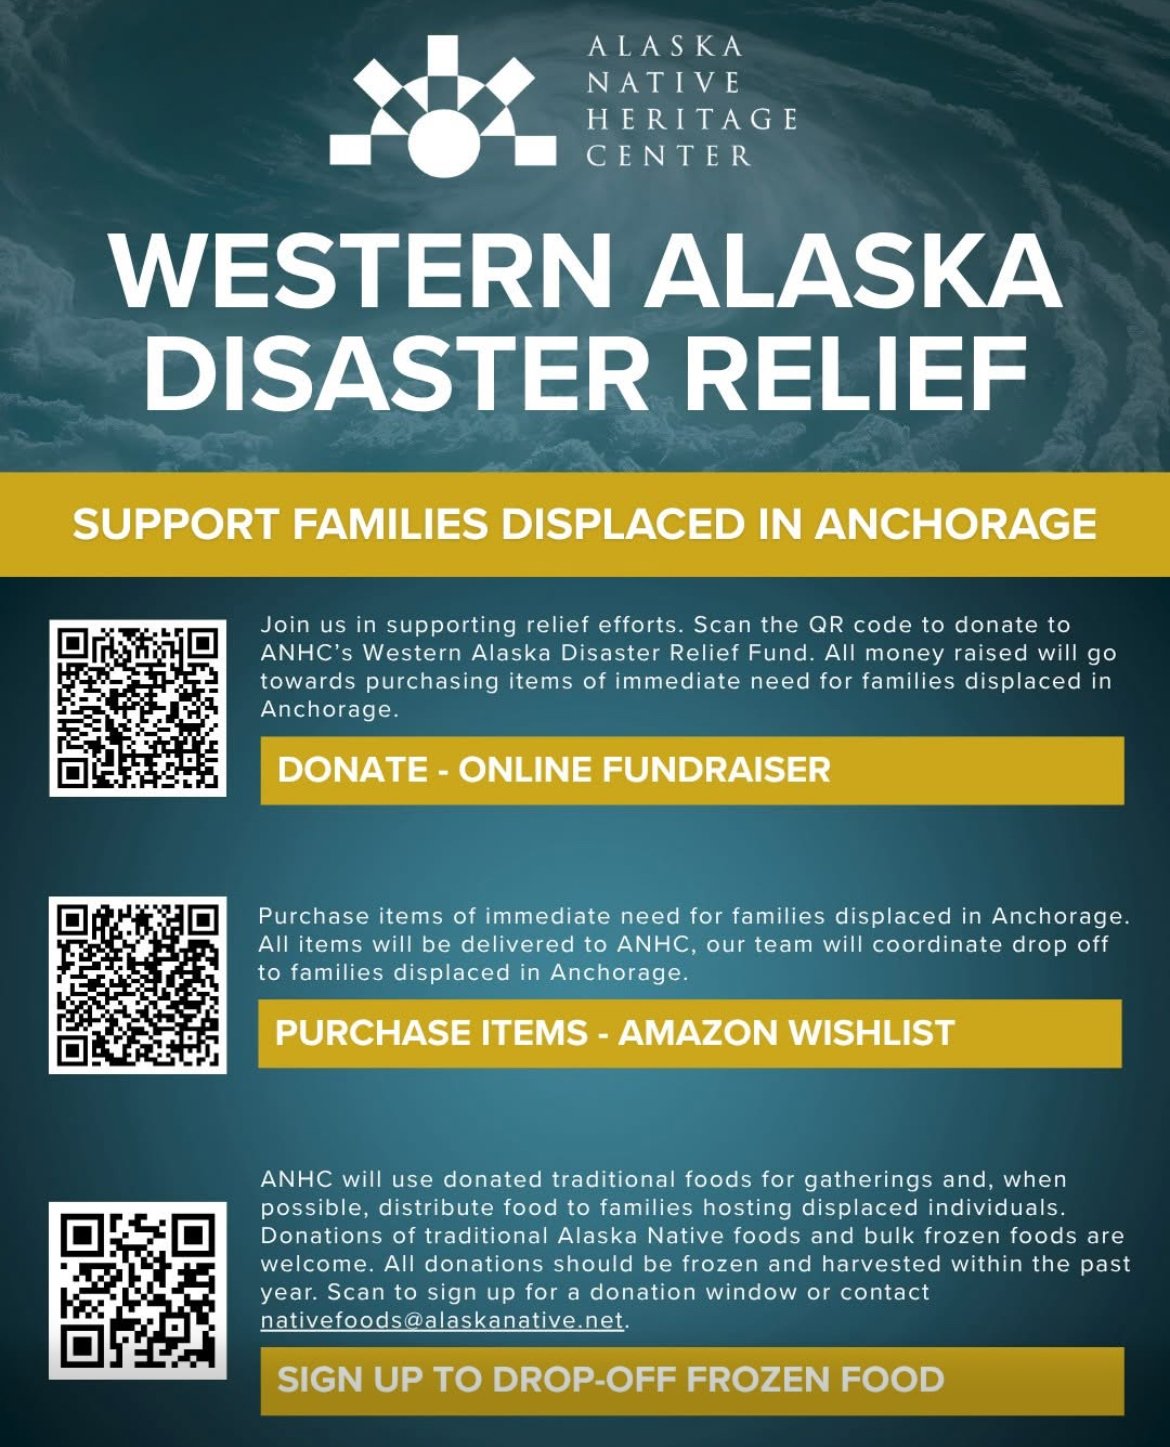
Typhoon Halong Relief & Recovery
Typhoon Halong brought devastating flooding to Western Alaska, displacing over 2,000 of our relatives across the Y-K Delta. Communities have come together in an incredible outpouring of love, generosity, and resilience. This post gathers verified ways to donate, volunteer, and support — from relief funds and food drop-offs to cultural care led by the Alaska Native Heritage Center and partners across the state. Together, we can help our families rebuild, heal, and find comfort in community once again. Quyana Cakneq for standing with Western Alaska.

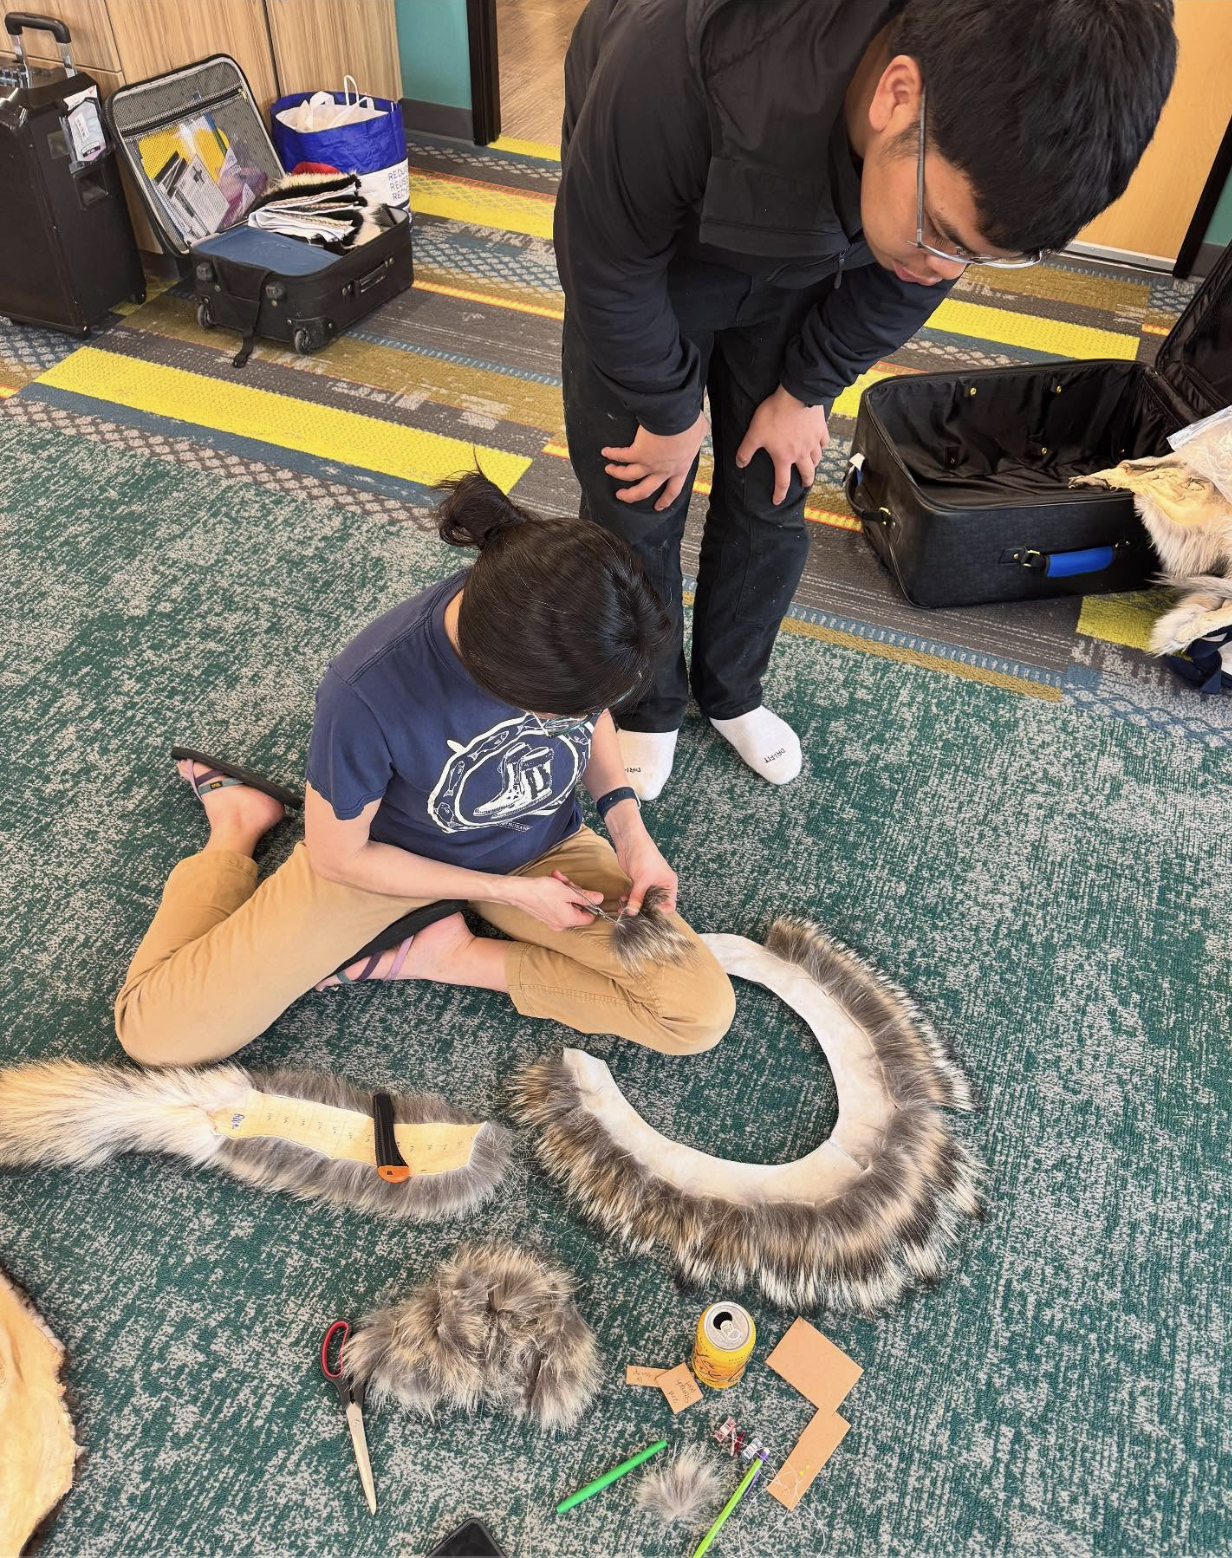
Step-by-Step Nasqurrun Making Guide
Nasqurrun (Headdress) made with decorative trimming, beaver, wolf fur, canvas, and embellished with beads.

Qaspeq Resource List
Check out this blogpost for all the qaspeq makers and qaspeq instructors.

Sew Yup'ik Uluaq Bag Pattern
Here is a fun bag pattern that represents an Uluaq. Uluaq in Yup'ik translates to woman's knife.

Grateful on so many levels
I feel very fortunate to have been able to see a portion of the amazing Yup’ik collection of handmade items by master artists from around the state and The Yukon Kuskokwim Area.

When Dreams Become Reality
My dreams became reality when I created my first pair of Piluguk. Piluguk in Yugtun translates to skin boot.


Sharing is Caring
As I was sharing around resources to my friends and family for various areas of need I thought why not share them with all of you.

Our Arizona Adventures
I am finally feeling myself again after our crazy Arizona adventure and ready to share all the fun things we did around Phoenix.

Zoom Qaspeq Classes
The first two zoom classes will be traditional qaspeq classes. And the third class will be a modern qaspeq class.
Have you learned from one of Sew Yup’ik’s Tutorials or Blogs?
Share it with me! I’d love to see your work!